
Adjusting Your TV Correctly
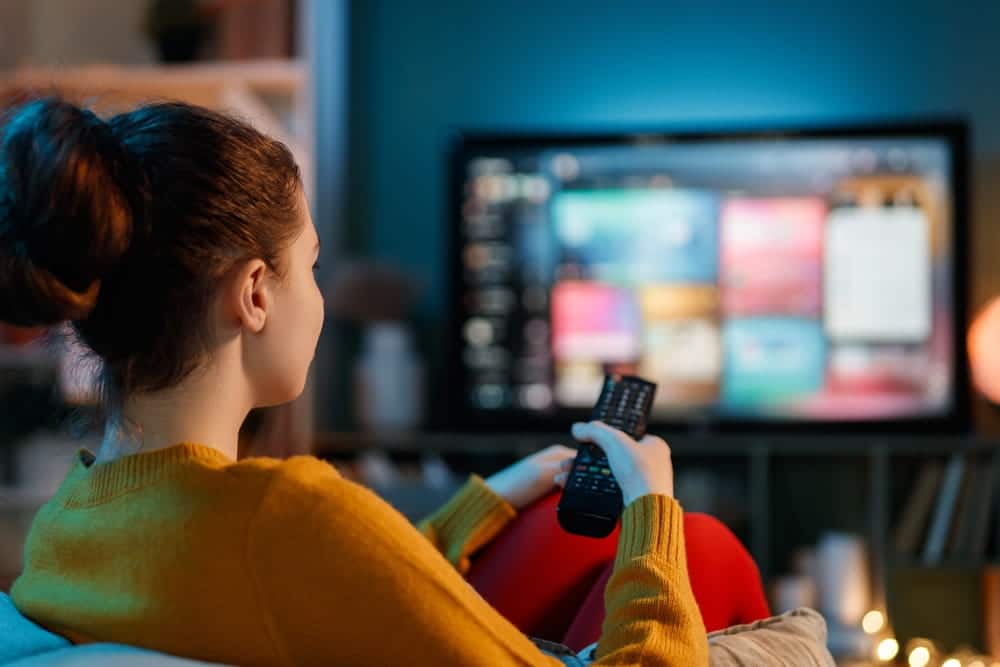
Anyone who wants to adjust their TV correctly faces a multitude of menu items and options that can seem overwhelming at first glance. However, often just a few targeted adjustments are enough to noticeably improve picture and sound. With the right picture mode, optimal brightness, balanced contrast, and appropriate sound settings, any TV can be adjusted correctly, making movies, series, and sports broadcasts feel as if you are right in the middle of the action.
Proper Room Preparation
Before delving into the actual picture settings in the menu, it is worthwhile to consider the external conditions. Location, distance to the screen, and the incidence of light in the room significantly influence the perceived picture quality and determine whether subsequent adjustments can even take effect. Neglecting these fundamentals will lead to unnecessary struggles with settings that cannot solve the actual problem.
1. Choose Optimal Location and Viewing Distance
The TV should be positioned so that the center of the screen is approximately at eye level when seated in the preferred viewing position. A viewing angle that is too high or too low not only distorts colors and contrast but can also lead to neck strain over time. The ideal viewing distance depends on the screen diagonal and resolution. For a 55-inch TV with 4K resolution, the recommended distance is between 1.5 and 2.5 meters. Sitting closer benefits from the higher pixel density of modern panels, while too great a distance makes fine details invisible and negates the advantage of high-resolution displays.
2. Control Room Lighting Conditions
Direct sunlight or bright windows opposite the screen create distracting reflections that render even the best picture settings ineffective. This effect is particularly noticeable with OLED TVs, whose screen surface reflects more than some QLED models. Curtains, blinds, or a changed setup position can help. For an evening home cinema experience, a slightly darkened room is recommended, where neither complete darkness nor harsh ambient light prevails. This foundation allows the TV to reproduce contrasts and colors as intended by the manufacturers.
Adjusting Picture Settings on Your TV Correctly
The basic picture settings determine how bright, contrast-rich, and color-accurate the TV picture appears. A few key controls in the menu are sufficient to replace factory compromises with a customized configuration tailored to your room and viewing habits.
3. Deactivate Energy-Saving Mode as the First Step
Many TVs are delivered with the energy-saving mode activated by default. This function drastically limits the maximum brightness of the panel to reduce power consumption. The result is a picture that appears flat and lacking in detail because dark areas show almost no definition, and bright picture areas do not illuminate sufficiently. This limitation is particularly noticeable with HDR content, as the extended brightness spectrum cannot be fully utilized. The energy-saving mode is located under General Settings, System, or a dedicated Eco menu item, depending on the manufacturer, and should be deactivated as the very first step in picture configuration.
4. Select the Appropriate Picture Mode
The picture mode is the most important basic setting on the TV and influences all subsequent parameters. A vivid or dynamic mode is often active by default, which unnaturally oversaturates colors, excessively boosts contrasts, and increases power consumption. For realistic picture reproduction, switching to Cinema or Filmmaker mode is recommended. Samsung calls this option Filmmaker Mode, LG calls it Filmmaker or Cinema, Sony offers Cinema or Custom, and Philips uses the designation Film or Filmmaker. These modes deactivate numerous artificial picture distortions and set a neutral color temperature that corresponds to the industry standard D65 with 6,500 Kelvin. The result may initially appear less spectacular than the vibrant factory settings, but it reproduces skin tones, landscapes, and dark scenes much more faithfully.
5. Correctly Adjust Brightness and Black Level
On most TVs, the brightness menu item does not control the screen’s luminance but rather the black level. It determines the threshold at which dark picture content becomes visible or disappears into black. If the value is set too low, the picture loses details in shadows and dark scenes. A value that is too high makes black appear milky and gray, diluting the overall picture impression. Test patterns with grayscale gradations, available for free from various providers, help find the optimal point. The black level is correctly set when the darkest gradations are just barely discernible, and deep black simultaneously appears rich and dense.
6. Coordinate Contrast and Backlight
While brightness controls the black level, the contrast control regulates the ratio between the brightest and darkest picture areas. A contrast set too high causes bright areas to burn out, so that clouds, snow, or light clothing, for example, no longer show any texture. A value that is too low creates a flat, lifeless-looking picture. A good starting point on most devices is between 80 and 95 percent of the maximum value. The actual luminosity of the panel is controlled separately via the backlight. On OLED TVs, this setting is often called OLED Brightness or Picture Brightness. This value should be adjusted to the room brightness. In darkened rooms, lower values are sufficient for a pleasant viewing experience, while bright living rooms during the day require a higher backlight setting.
Adjust Colors, Sharpness, and Picture Optimization
After brightness and contrast are set, it’s time for fine-tuning colors, sharpness, and the numerous picture optimizers that modern TVs offer. This is where the difference between a good and a truly convincing TV picture lies.
7. Set Colors and Color Temperature Naturally
The color control determines the saturation of the displayed colors. If it is set too high, skin tones appear orange, grass glows neon green, and the overall picture impression is unnatural. Conversely, values that are too low make the picture appear pale and washed out. The default value on most manufacturers’ devices is already close to optimal if a suitable picture mode has been selected beforehand. More crucial is the color temperature, which determines whether the entire picture appears warmer or cooler in tone. The Warm or Warm2 setting comes closest to the video standard of 6,500 Kelvin and ensures that white areas actually appear neutral, rather than having a cold blue tint or an overly yellowish hue. Advanced options such as color settings per color space or an extended color space for HDR content are aimed at advanced users and ideally require professional calibration.
8. Correctly Adjust Picture Sharpness
The sharpness control on a TV works differently than its name suggests. It adds artificial edge enhancements to the picture, which, at high values, create visible double contours and an unnaturally over-sharpened image. For native 4K content, which is already in full resolution, additional sharpness enhancement is not only superfluous but counterproductive. A value between 0 and 20 percent yields the best result on most devices and models. The actual picture sharpness is determined by the resolution of the source material and the native panel resolution, not by the sharpness control in the menu. For SD or HD content upscaled on a 4K display, a slightly increased sharpness value can occasionally be useful but should always be used with caution.
9. Control Picture Optimizers and Sensors
Modern televisions offer a wealth of AI-powered image enhancers with names like Dynamic Contrast, Clear Motion, Noise Reduction, Auto Brightness, or White Balance Optimization. These algorithms analyze the image in real-time and automatically adjust contrast, brightness, or color values. In theory, this sounds promising; however, in practice, aggressive image enhancers often distort the original picture, create visible artifacts, blur fine textures, or cause distracting flickering during fast scene changes. As a general rule, it is advisable to first set all image enhancers to the lowest level or completely deactivate them. The ambient light sensor, which automatically adjusts image brightness to the room’s lighting, can certainly be useful in everyday life, but for targeted image optimization, it should also be temporarily switched off to achieve reproducible results.
Motion Smoothing and Special Picture Modes
In addition to the classic basic picture settings, current TV sets offer a range of specialized modes tailored to specific content. From motion smoothing for films to HDR playback and gaming mode, the viewing experience can be specifically adapted to the respective application.
10. Control Motion Smoothing Specifically
Motion smoothing, known as Auto Motion Plus on Samsung, TruMotion on LG, and Motionflow on Sony, calculates artificial intermediate frames to display movements more fluidly. For sports broadcasts, this technology can certainly offer an advantage, as fast camera pans and ball movements appear smoother and clearer. However, for feature films and series, the same function leads to the so-called soap opera effect, which makes high-quality productions look like cheap television shows. The cinematic look of 24 frames per second, which directors deliberately use, is lost due to the interpolated intermediate frames. The recommendation is therefore to completely deactivate motion smoothing for films or reduce it to the absolute minimum. Those who switch between films and sports can specifically adjust this setting or use separate picture modes for different content.
11. Use Filmmaker Mode for Feature Films
Filmmaker Mode is a cross-manufacturer standard that originated from an initiative by the UHD Alliance and is supported by numerous filmmakers. It automatically deactivates motion smoothing, artificial sharpness enhancement, and other picture manipulations to reproduce films and series exactly as they were mixed in the production studio. The color temperature is set to the D65 standard, the gamma value is adjusted to the reference value for feature films, and the backlight is calibrated so that both bright and dark scenes are reproduced faithfully. On many devices from Samsung, LG, Panasonic, and Philips, this mode can also be activated automatically as soon as a corresponding flag is detected in the film signal. For your favorite daily film, it offers the simplest method to achieve an authentic cinema experience in the living room.
12. Optimal HDR Content Playback
High Dynamic Range, or HDR, significantly expands the brightness and color range of the TV picture. Formats such as HDR10, HDR10+, and Dolby Vision deliver significantly more gradations between the brightest and darkest picture areas than is possible with conventional SDR material. To exploit this potential, the HDMI connection must be switched to Enhanced or Deep Color, as the standard HDMI mode blocks the extended color space. For HDR content, the backlight should be set to the maximum or at least a very high value so that the peak brightness that characterizes the format actually becomes visible. The energy-saving mode must remain deactivated in any case, as it caps the luminance essential for HDR. For normal SDR content, a gamma value setting of 2.2 is recommended for bright rooms and 2.4 for darkened home theater rooms.
13. Activate Game Mode for Gaming
For a lag-free gaming experience, game mode is indispensable. In normal picture mode, each individual frame undergoes complex calculations before appearing on the screen. This processing chain creates a noticeable delay between controller input and picture reaction, known as input lag. Game mode deactivates time-consuming image processing such as motion smoothing, noise reduction, and dynamic contrast, thereby reducing input lag to a few milliseconds. Modern HDMI 2.1 ports also support Auto Low Latency Mode, which automatically activates game mode as soon as a game console is detected. Variable Refresh Rate, or VRR, synchronizes the TV’s refresh rate with the console’s output, thereby preventing visible tearing, i.e., the breaking up of the picture during fast movements.
Optimize Sound Settings on Your TV
A perfect picture only unfolds its full effect in combination with good sound. The sound settings of modern TVs offer significantly more scope than often assumed. From choosing the right sound mode to improving speech intelligibility and connecting external audio systems, audio playback can be significantly enhanced with a few simple steps.
14. Use Sound Modes and Equalizer Specifically
Similar to picture modes, most TVs also offer various presets for sound. Modes such as Standard, Cinema, Music, Sports, or Speech adjust the frequency distribution to the content. Cinema mode generally emphasizes low frequencies and creates a more spatial sound impression, while Speech mode highlights mid-range frequencies, thus making dialogues clearer. Some manufacturers also offer AI-powered sound optimization that analyzes the audio signal in real-time and automatically adapts it to the respective content. Those who prefer to intervene themselves will find a manual equalizer in many devices, through which individual frequency bands can be specifically boosted or cut. For news programs and talk shows, it is advisable to slightly boost the mid-range frequencies between 1 and 4 kilohertz, as most human speech lies within this range.
15. Improve Speech Intelligibility in Dialogues
Unclear dialogues are among the most common complaints when watching TV. The cause often lies in the sound mixing of modern films and series, where background music and sound effects overlay spoken words. Many TVs offer dialogue enhancement or speech boost for this purpose, which can be found in the sound menu under names like Clear Voice, Voice Zoom, or Dialogue Boost. This function specifically boosts the frequency ranges of the human voice without noticeably changing the rest of the soundtrack. Additionally, automatic volume adjustment, which goes by names like Auto Volume, Volume Leveling, or Night Mode, helps. It compensates for abrupt volume differences between quiet dialogue scenes and loud action sequences and prevents the volume from having to be constantly adjusted manually. This function is particularly valuable for households where TV is watched in the evening at reduced volume.
16. Set Up External Audio Systems via HDMI-ARC
The integrated speakers of most TVs quickly reach their physical limits when reproducing dialogues, music, and effects. The flat housings of modern TV sets leave little room for speaker membranes that could produce a full sound. Investing in an external audio system, such as a TV voice amplifier, can dramatically improve sound and dialogue quality. Soundbars and AV receivers are also popular alternatives that can ideally be connected via the HDMI-ARC or eARC interface. The advantage of this connection is that the TV automatically mutes its internal audio output and allows volume control via a single remote control. In the sound menu, the output format should be set to Passthrough, Bitstream, or Automatic so that Dolby and DTS signals are forwarded unchanged to the external system and can be decoded correctly there. If sound failures occur after a channel scan or frequency change, switching the decoding setting to AC3, Dolby Stereo, or Automatic often helps.
Channel Management and Initial Setup
In addition to picture and sound, a well-organized channel list is also part of a properly set up TV. With a channel scan and individual favorite lists, daily program navigation can be significantly accelerated.
17. Perform Channel Scan and Create Favorite Lists
After the initial setup or if programs are missing, an automatic channel scan searches the entire frequency spectrum of the selected reception type, whether cable, satellite, or antenna. This process takes a few minutes, depending on the provider and network scope, and should be repeated at regular intervals to find newly added channels and clean up outdated entries. Especially after frequency reassignments by the provider or the shutdown of old SD signals, a complete new scan can prevent certain channels from suddenly disappearing. After the scan, it is advisable to create favorite lists that include only the channels actually used. With several hundred receivable channels, this filtering ensures that only relevant programs appear during daily channel switching. If the automatic scan does not find certain channels, a manual scan with direct input of frequency, modulation, and symbol rate can help.
18. Perform Firmware Updates Regularly
A TV’s software not only affects stability and security but can also directly improve picture and sound quality. Manufacturers provide optimized algorithms for image processing, new sound modes, and bug fixes for known issues such as audio dropouts or faulty HDMI detection via firmware updates. Most current TVs automatically download updates via the existing internet connection and install them in standby mode. Whether this function is active can be checked in the menu under System, General, or Support. If no internet connection is available, manufacturers offer firmware files for download on their support pages. These are copied to a USB stick and installed via the corresponding menu item on the TV. During the update process, the device must under no circumstances be disconnected from the power, as an interrupted update can lead to permanent software damage.
Frequently Asked Questions
Adjusting your TV correctly can be done in four steps: First, deactivate the energy-saving mode, then select the appropriate picture mode (Cinema or Filmmaker for movies), subsequently fine-tune brightness, contrast, sharpness, and color temperature, and finally optimize the sound settings using sound modes and, if necessary, an external audio system.
For most content, Cinema or Filmmaker mode provides the most natural picture reproduction. It deactivates artificial picture distortions and sets a neutral color temperature that corresponds to the video standard D65 with 6,500 Kelvin. For gaming, the separate game mode, which minimizes input lag, is recommended.
That depends on the content. For feature films and series, motion smoothing should be deactivated, as it destroys the intended cinematic look and creates the soap opera effect. For sports broadcasts, however, it can be useful because fast movements are displayed more fluidly.
The sharpness control adds artificial edge enhancements to the picture. For native 4K content, this is superfluous and, at high values, creates visible double contours. A value between 0 and 20 percent yields the best result on most TVs. The actual picture sharpness is determined by the resolution of the source material.
TVs are often delivered with dynamic or vivid mode activated by default, which oversaturates colors and excessively boosts contrasts. These settings are designed to stand out in electronics stores under neon lighting but are unsuitable for the living room. Switching to Cinema or Filmmaker mode solves this problem.